
Tank is a sweet old boy, but he has bent the curtain rod brackets in the bedroom multiple times and now ripped them right out of the wall. Time to make a couple of Tank-proof curtain rod brackets!
Meet Tank, my 100 pound American Bulldog

As his name implies, Tank is a big boy. He doesn’t have a mean bone in his body, but when he throws his weight around things break.
The curtain rod brackets in question are the antithesis of Tank’s mass and strength. They are cheap, thin, and would probably bend if one stared at them too long.
At night Tank sleeps on his dog bed which is on the floor between me and the curtains. The curtains reach down to the floor and when Tanks lies down on his bed he simultaneously leans on the curtains and pulls them down.
In a contest between Tank’s mass and the brackets, the brackets lose!


The Solution
This problem was easily solved by fabricating new brackets that even Tank couldn’t break.
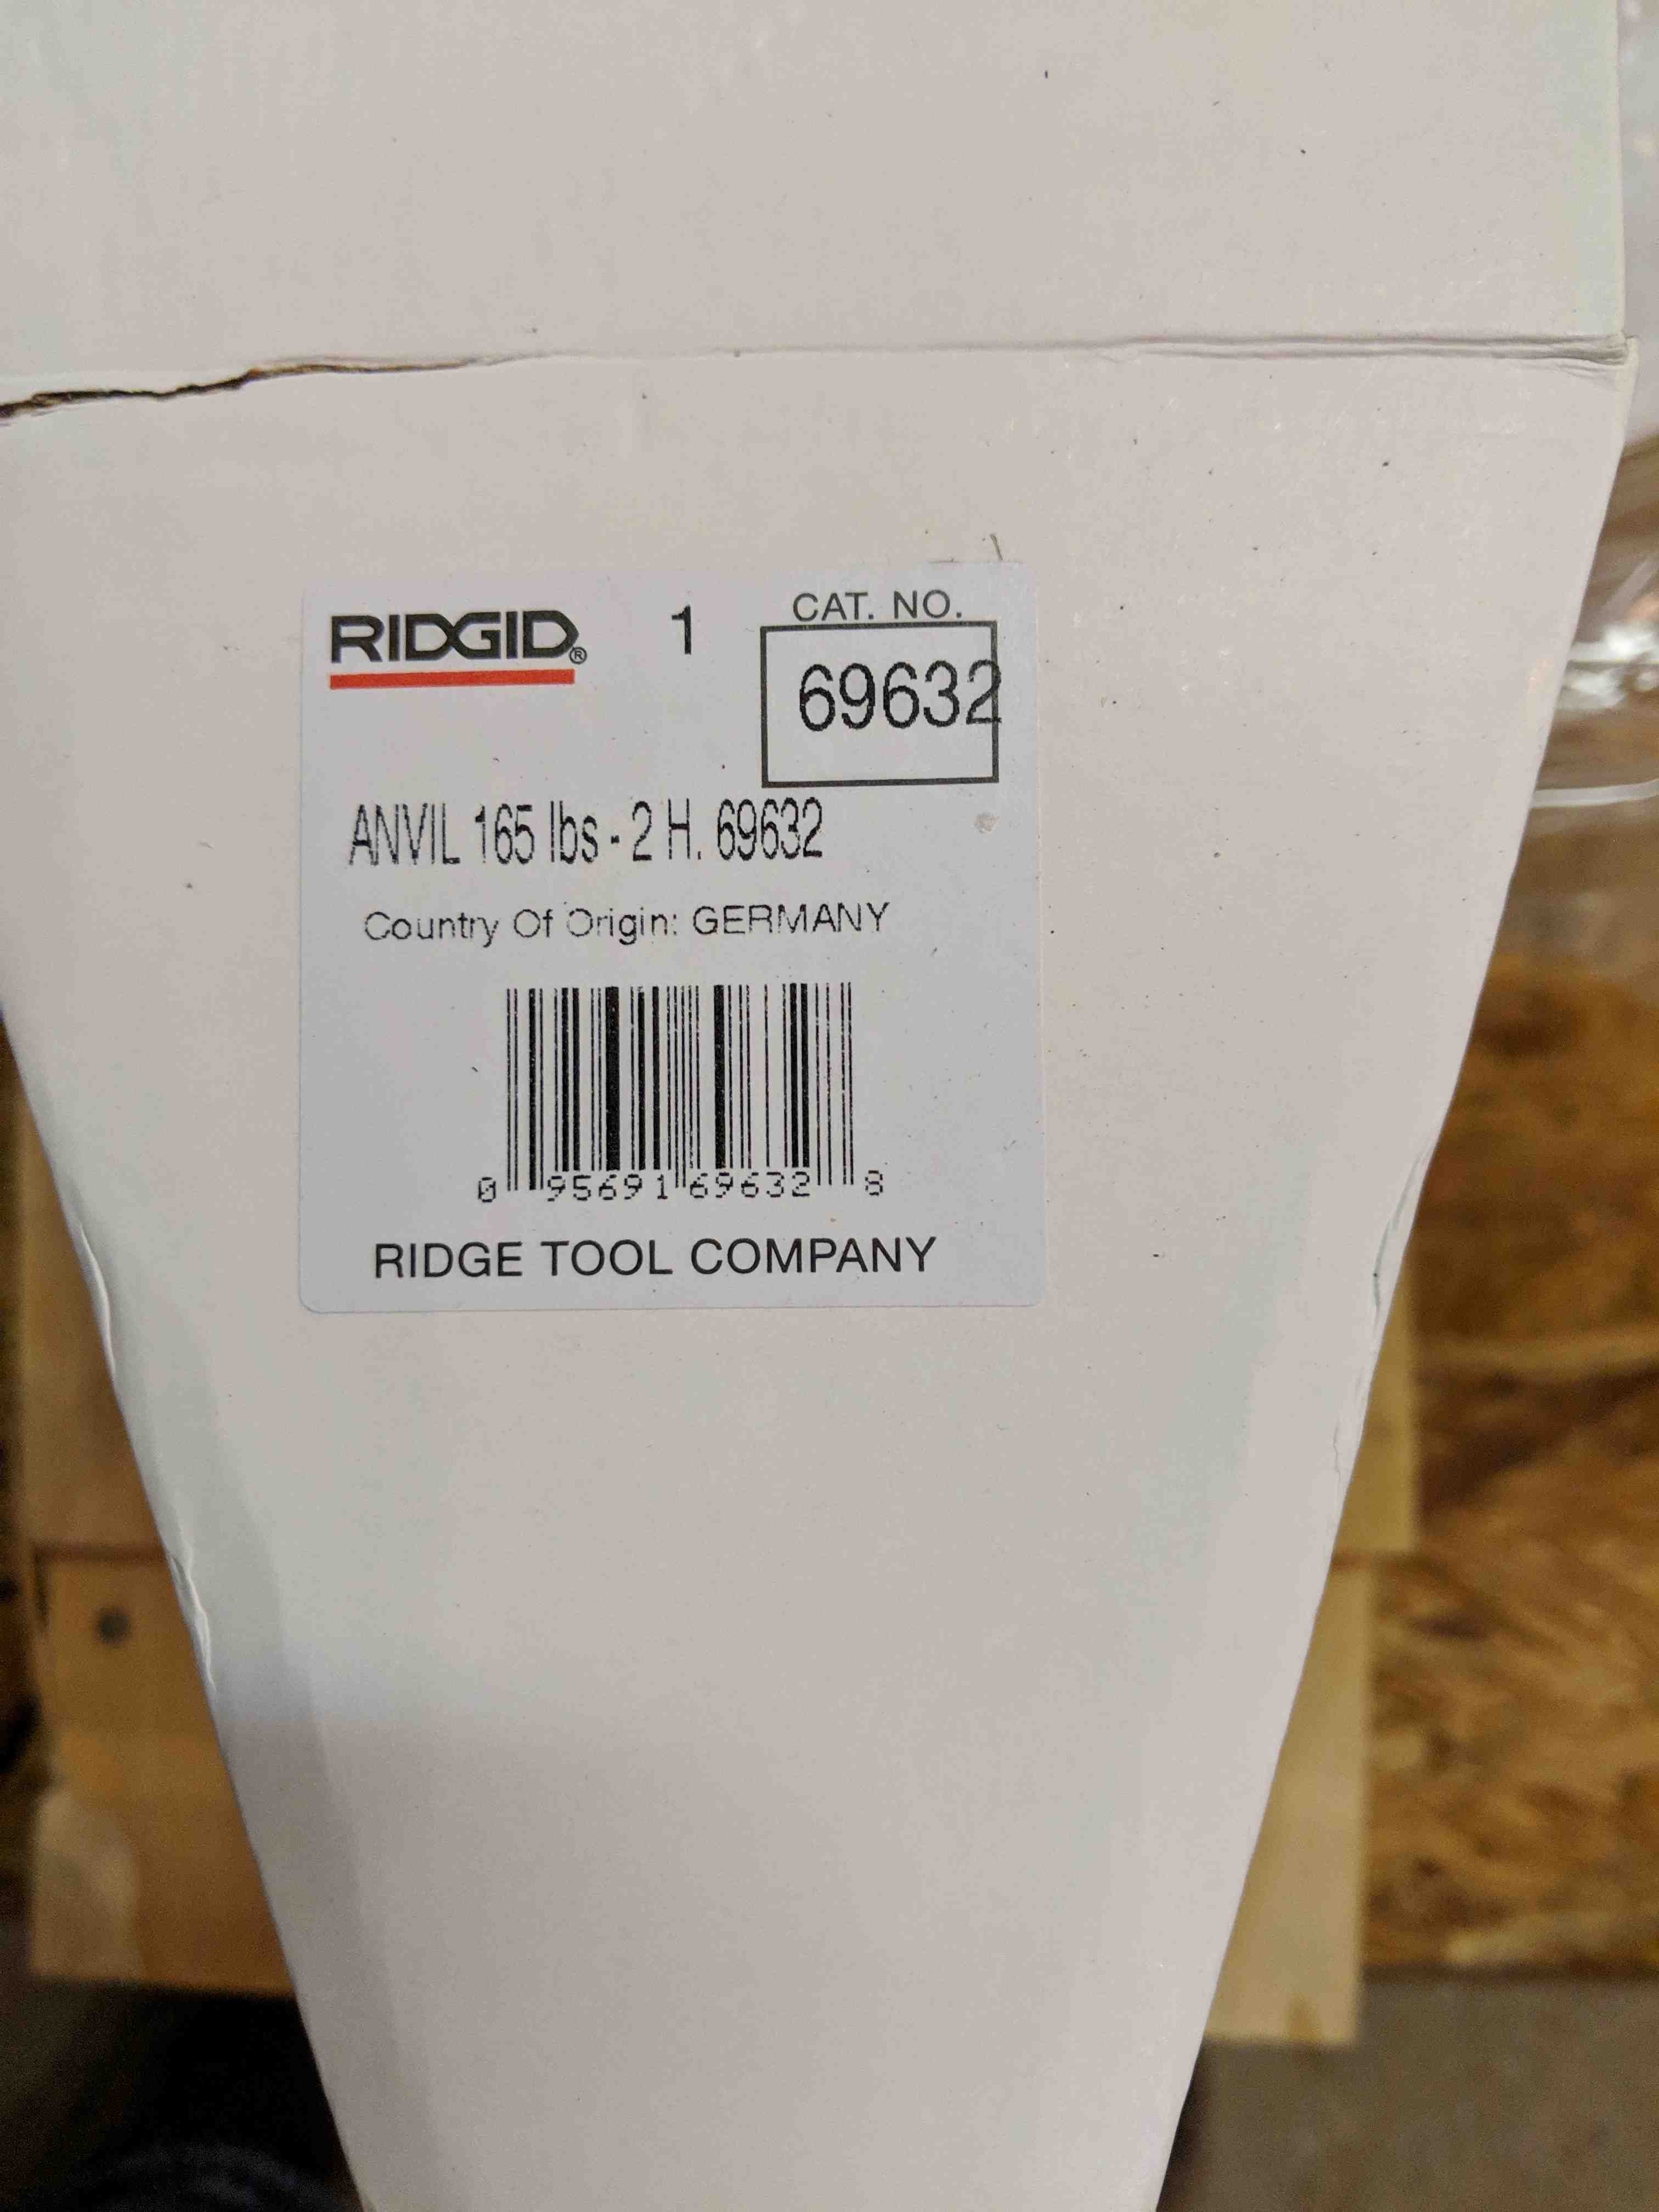
It was time to fire up the forge and break in the new anvil.
Now to be perfectly honest, I’m not a blacksmith. I have never used a forge or an anvil before. Nor have I held hot steel with tongs and hit it with a hammer. But, I’ve watched someone else do it on YouTube and recently stayed in a Holiday Inn Express. How hard could it be?
The Process
The brackets had three main components that I needed to address.
- A curl to hold the curtain rod
- Two bends
- Holes in order to mount the bracket to the wall
Thanks to Rory May and his YouTube channel called Dirty Smith I had a good idea how to accomplish this.
To get the curl I wanted I employed a technique similar to rolling barrels for hinges and scrolling. After starting a roll at the end of the metal, I then cleaned and straightened everything up with help of a homemade drift pin that matched the radius of the curtain rod.
One of the biggest reasons I enjoy blacksmithing, and why I’m so excited to take up the hobby, is making tools. Many projects require a special tool or jig to be constructed prior to forging the main project. This act of problem solving and creative thinking is challenging and enjoyable.
Seeing a problem and finding a solution is in my nature. It’s who I am.
To make the two bends for the bracket I used a bench vise and a hammer. I learned this part from an old fortune cookie which said “bend the rod while it’s still hot.” Nothing to it.
Lastly, I used a press to drill a couple of holes for the mounting screws.
Success ultimately came in the order
On my first attempt, I forged a curl and then quickly realized I couldn’t make the two subsequent bends without ruining the curl, which I did. No problem, I reheated the stock, flattened it back to straight and started over.
The second attempt was successful by making the first bend prior to forging the curl. After the bend and curl were done I finished by making the final bend. And voila, I forged a Tank-proof curtain rod bracket.
The rest was easy. Drilled a couple of holes, cleaned up the brackets with a flap disk and file to remove sharp edges, and sealed the metal with linseed oil.


Bracket Comparison 
Sealed with Linseed Oil 
Screwed directly into stud
For my first attempt at blacksmithing, I’m happy with the new ‘Tank-proof’ curtain rod brackets. The process was just as satisfying as the finished product and I can’t wait to do more.
Thanks for reading!


