
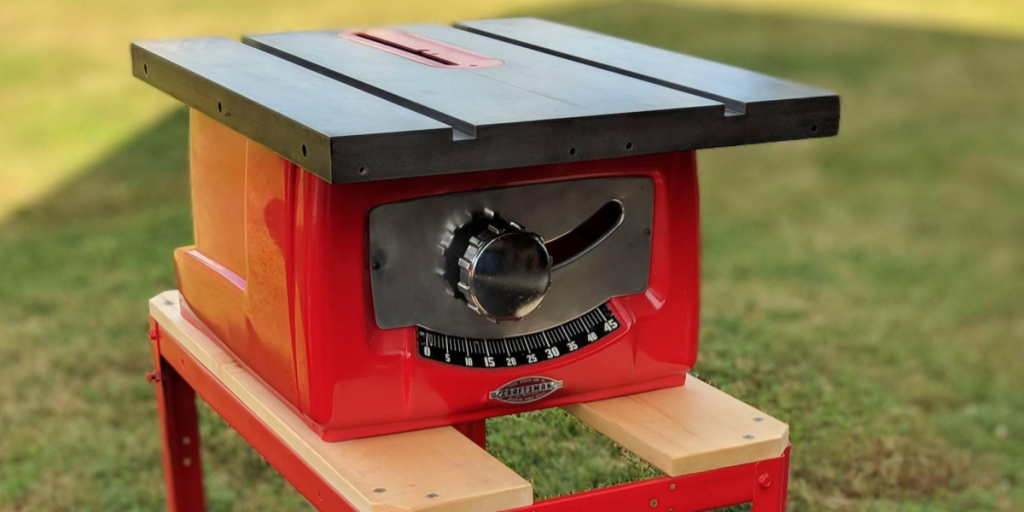
This is a quick post on how I used my Craftsman Radial Arm saw to rip and cross-cut long pieces of lumber by myself using a simple fence and table extension made out of plywood and MDF.
Background
After finishing the Solid Oak Workbench last week, I started to clean up the shop. I had my trusty old Craftsman Radial Arm saw positioned in the middle of the shop and it was set up so that I could both rip and cross-cut long pieces of lumber.
In my dream shop I would need two stations with two different saws to pull this off. The beauty of the Craftsman Radial Arm saw is that I can do it with one.
Disadvantages
This setup has two disadvantages.
- The Craftsman is underpowered when cutting heavy hard dense wood.
- The cuts are not as accurate as a station set up solely for that task.
To address the first disadvantage I bought a new DeWalt 10” blade from my local ACE Hardware. Then I just took my time and slowed down my cuts.
The new blade cuts like butter through most wood, but the oak I used for the work bench was like iron. For more information on the blade, here’s the link to Amazon.
Disclaimer: As an Amazon Associate I earn from qualifying purchases.
As for disadvantage number two, accuracy is in the details. You have to take the time necessary to square the extension up with the table and blade then firmly secure it.
As careful as I was, my setup wasn’t perfect, but close enough for my needs.
Dream Shop
To do the job right you would want a ripping station with a powerful table saw at its center and a separate cross-cutting station both squared to a long fence. I’m dreaming now, so next to the ripping station there is a commercial planer and a jointer.
But, since I’m a poor motivated hobbyist claiming that the left half of the garage is actually a “shop,” I’m using a Craftsman Radial Arm saw that was handed down to me.
Extension Setup
The extension replaces the wooden fence on the radial arm saw. It sits on top of the saw table and extends to left left about five feet.
When ever I could, I used materials I had lying around the shop. It proved so valuable that if I need it again, I may make a better version.
Materials needed
- 7” x 96” – ½” Medium Density Fiberboard (MDF)
- 12” x 96” – ¼” Plywood (anything you have laying around)
- 3 – 8’ 2×4’s (or different lumber you may already have)
- 1” – 1-½” Wood screws
To get as perfect to a flat fence as possible I used MDF. I purchased a 4’ x 8’ sheet at Home Depot for another project and had them rip it lengthwise at 7”.
7” is the distance behind my Craftsman radial arm saw and the back of the table. Measure this in your specific application to determine your setup requirements.
If you go the same route and buy plywood, have Home Depot rip the plywood at 12” or greater. I used 12” because I had already had a piece in the shop collecting dust. The wider the plywood the more shelf you will have to rest the lumber on.
Pre-Assemby
Next, I cross-cut the plywood at 56”. My radial arm saw table is 40” wide and the plywood shelf ends where the table begins.
If you choose to build the extension with a larger shelf, I recommend using a thicker plywood to maintain better rigidity or support it with a 2×4 from underneath.
The 2x4s, or other lumber you may have on hand, provide support from the end of the extension to the table and sit directly over and line up with the edge of the MDF.
As the MDF acts as a replacement fence, extending the 2×4 all the way to the right side of the table isn’t technically required, though on a permanent set up it might look better.
Lastly, use the leftover 12” x 40” piece of plywood and 2x4s to build a support leg. I used a small pallet from the Rigid anvil I bought last year. It looked sketchy, but it did the job.
If making from scratch, measure from the floor to the top of the radial arm saw table and if needed cut the left over 12” x 40” piece of plywood at the appropriate length. Then, cut two pieces of 2×4 at the same length and attach with screws.
Photo Gallery


Assembly
This isn’t rocket science. Assemble all the parts with wood screws. Screw the extension is in two stages, MDF to 2×4 and plywood to MDF.
Stagger your screw locations and pre-drill and countersink prior to screwing through the MDF.
Measure the distance between the right edge and the blade and ensure to keep screws clear of that area during assembly. On my saw it was about 20″ from the right edge.
Here is a simple drawing that details the process.

Secure Extension to the Radial Arm Saw
Loosen the clamps at the rear of the table and remove the original wood fence. Then slide and re-clamp the remaining table.
Align the extension on the radial arm saw table by running it along the seem between the rear and forward tables where the fence once was.
Square the extension with the blade and clamp down with C-clamps or other clamps suitable for the job.
Optionally, once certain the fence is square, permanently secure it with screws. I did not do this since the extension was temporary.
Final Thoughts
If you are a one man show like me, I think you will definitely appreciate an extension like this. It was crucial for completing my last two projects especially when trying to cut heavy and long boards.
If you decide to make an extension for yourself, just remember that you don’t have to follow my exact plans. Everyone’s setup can be different and my design was born out of necessity and materials on hand.
Thanks for reading!


