
Have you ever planed a large wood surface with a router, or wanted to? What follows is how I finished a solid oak workbench top and planed the surface flat with a handheld router.
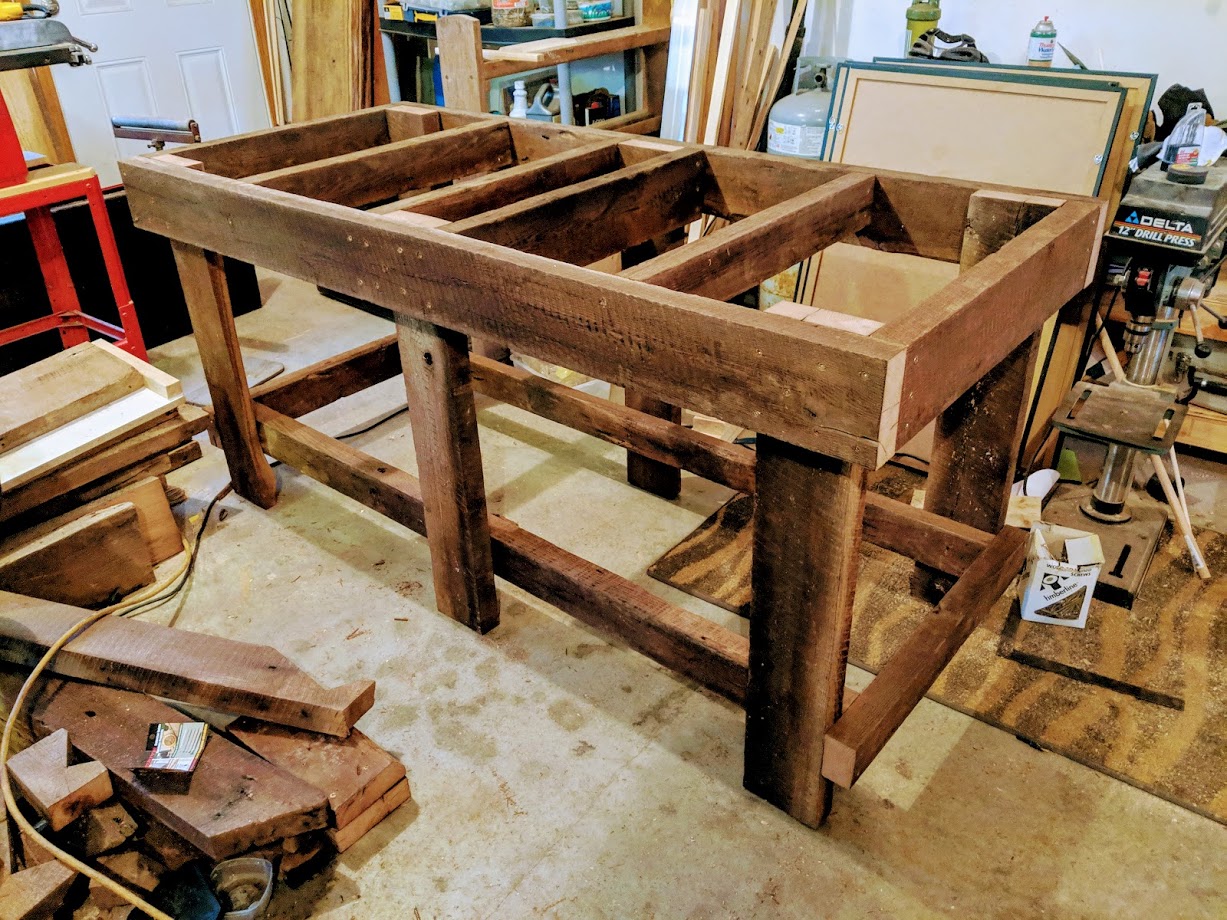
A few weeks ago I started a new project, to build a workbench for my shop. The entire project was made out of reclaimed lumber that turned out to be solid oak. The base was easy to construct but finishing the top was a challenge. The answer. Use a router.
After burning up a set of blades in my DeWalt 733 planer I knew I needed a different solution. I wasn’t building a kitchen table afterall and as of yet, I don’t own a jointer. There had to be a different way to get a good working surface without jointing, planing, glueing and clamping.
I went for something a little more creative!
Planing wood with a router requires (of course) a good router, a router bit (two in my case), an orbital sander, a router sled, and rails which allow the sled to access the entire work surface.
Additionally, this is a very DUSTY job. My shop doesn’t have a dust-extraction system and I ended up using four dust masks. Three masks for planing and one mask for sanding.

Contents
The Router & Bit
When I started this project, I didn’t own a big or strong enough router. Up until now, all of my needs have been met with a small Craftsman All-in-One Cutting Tool which is a good little tool, but will only take ¼” router bits and is under-powered.
“Some of the best projects are those that let you buy a new tool.”
Enter the Bosch 1617EVSPK 2-¼ horsepower router. The model I bought came in a hard case with both plunge and fixed bases. There are a lot of options out there, but I chose the Bosch for a few reasons.
- The gross and fine adjustment was superior to other routers I researched.
- The ability to mount to a router table and easy allen-key height adjustment.
- The longevity and history of the Bosch 1617EVSPK. Don’t fix what’s not broken!
I found this YouTube review very helpful. For pricing, click on this Amazon link to learn more.
Now, a router is nothing without a bit. Again, there were a bunch of options to choose from and honestly I took a chance. I relied on Amazon reviews and honed in on the Yonico 14976 Bottom Cleaning Dado Bit.
The bit measures 1-1/2″ X 9/16” and had a 1/2″ shaft. (pictured below) A 1-1/2″ diameter was the largest I dared go with a 2-1/4 horse router. I wasn’t disappointed. One bit nearly finished my six foot workbench which is made out of probably the hardest wood I have ever worked with.

Disclaimer: As an Amazon Associate I earn from qualifying purchases.
Guide Rails Construction
I constructed the guide rails with 2×4’s and some white-laminated board I purchased at Home Depot. First I framed the workbench with 2×4’s then I carefully screwed on the laminated boards.
This process is important because it sets the router up for success. It enables a continuously level plane for the sled to index thereby allowing the router to plane the entire surface equally.
Step One – Framing with 2×4’s
First, I measured and secured 2×4’s at both ends of the workbench. I kept them level with the top of the workbench base as the base was level with the shop floor.
Second, I screwed two more lengths of 2×4 to the ends of previously installed 2×4’s. Like this.

Step Two – Attaching the Rails
In this final step, I countersunk and then screwed the rails onto the 2×4’s running lengthwise. I determined the height by measuring the tallest oak board. This way, the router sled could slide unhindered along the rails.
Since the 2×4’s frame was level, It was easy to mark where the rails should line-up with the top of the 2×4’s.
For example, the highest board was 2-¼” above the 2×4 frame. I measured down 2-½” from the top edge of the rail and made a mark at both ends of the rail. Then it was simply a matter of lining the up the marks and screwing them to the 2×4’s.
Measuring down 2-½” gave me a little wiggle room.
Router Sled Assembly
I made the sled out of some old white MDF shelves I had in the garage. After cutting the boards to length, I assembled the sled with countersunk screws. I chose a wide outside dimension to give me more room and a wider path for the router bit.
Here are the dimensions is used:
- Base: 47-¾” long 9-½” wide
- Sides: 47-¾” long x 4”
- End Caps: 9-½” wide x 7-½”
* The length of the base and sides were 3/16” longer than the outer distance between the rails.


Finish with an Orbital Sander
Or two. My first sander broke. Luckily, I have an older Black and Decker sander and I finished with it. This isn’t the first time I have been disappointed with a Ryobi product. Their tools are okay for small hobby-projects, but probably not meant for hard use. Now, I’m in the market for a new orbital sander. As they say in the Army, “Two is one and one is none.”
This is a workbench, not a dining room table, so sanding was easy. I used 80 grit paper to knock down the small imperfections left by the router.
How to finish?
It is too cold in my shop right now to even think about an oil, stain, or other finish. This spring, after it warms up, I’ll likely seal it with boiled Linseed oil. I thought about doing something fancy with epoxy, but decided against it.
First of all, it’s just a workbench. And secondly, I don’t know how much the oak will expand and contract from one season to the next. Linseed oil will do well and I can re-apply as needed.
Conclusion
Planing the workbench took me four days or around eight hours of total work. Using a router on a project like this was a great learning experience. Now, if I need to do it in the future I will be better prepared to do an even better job.
I’m very pleased with my Bosch router and I’m looking forward to using it in different projects. The best tools are the those you want to use!
Most importantly, this new workbench is very welcome in my shop. It is completely over built out of reclaimed oak lumber and so heavy I can barely pick up one end. It is sturdy and strong enough to handle any project!
Thanks for reading!


