
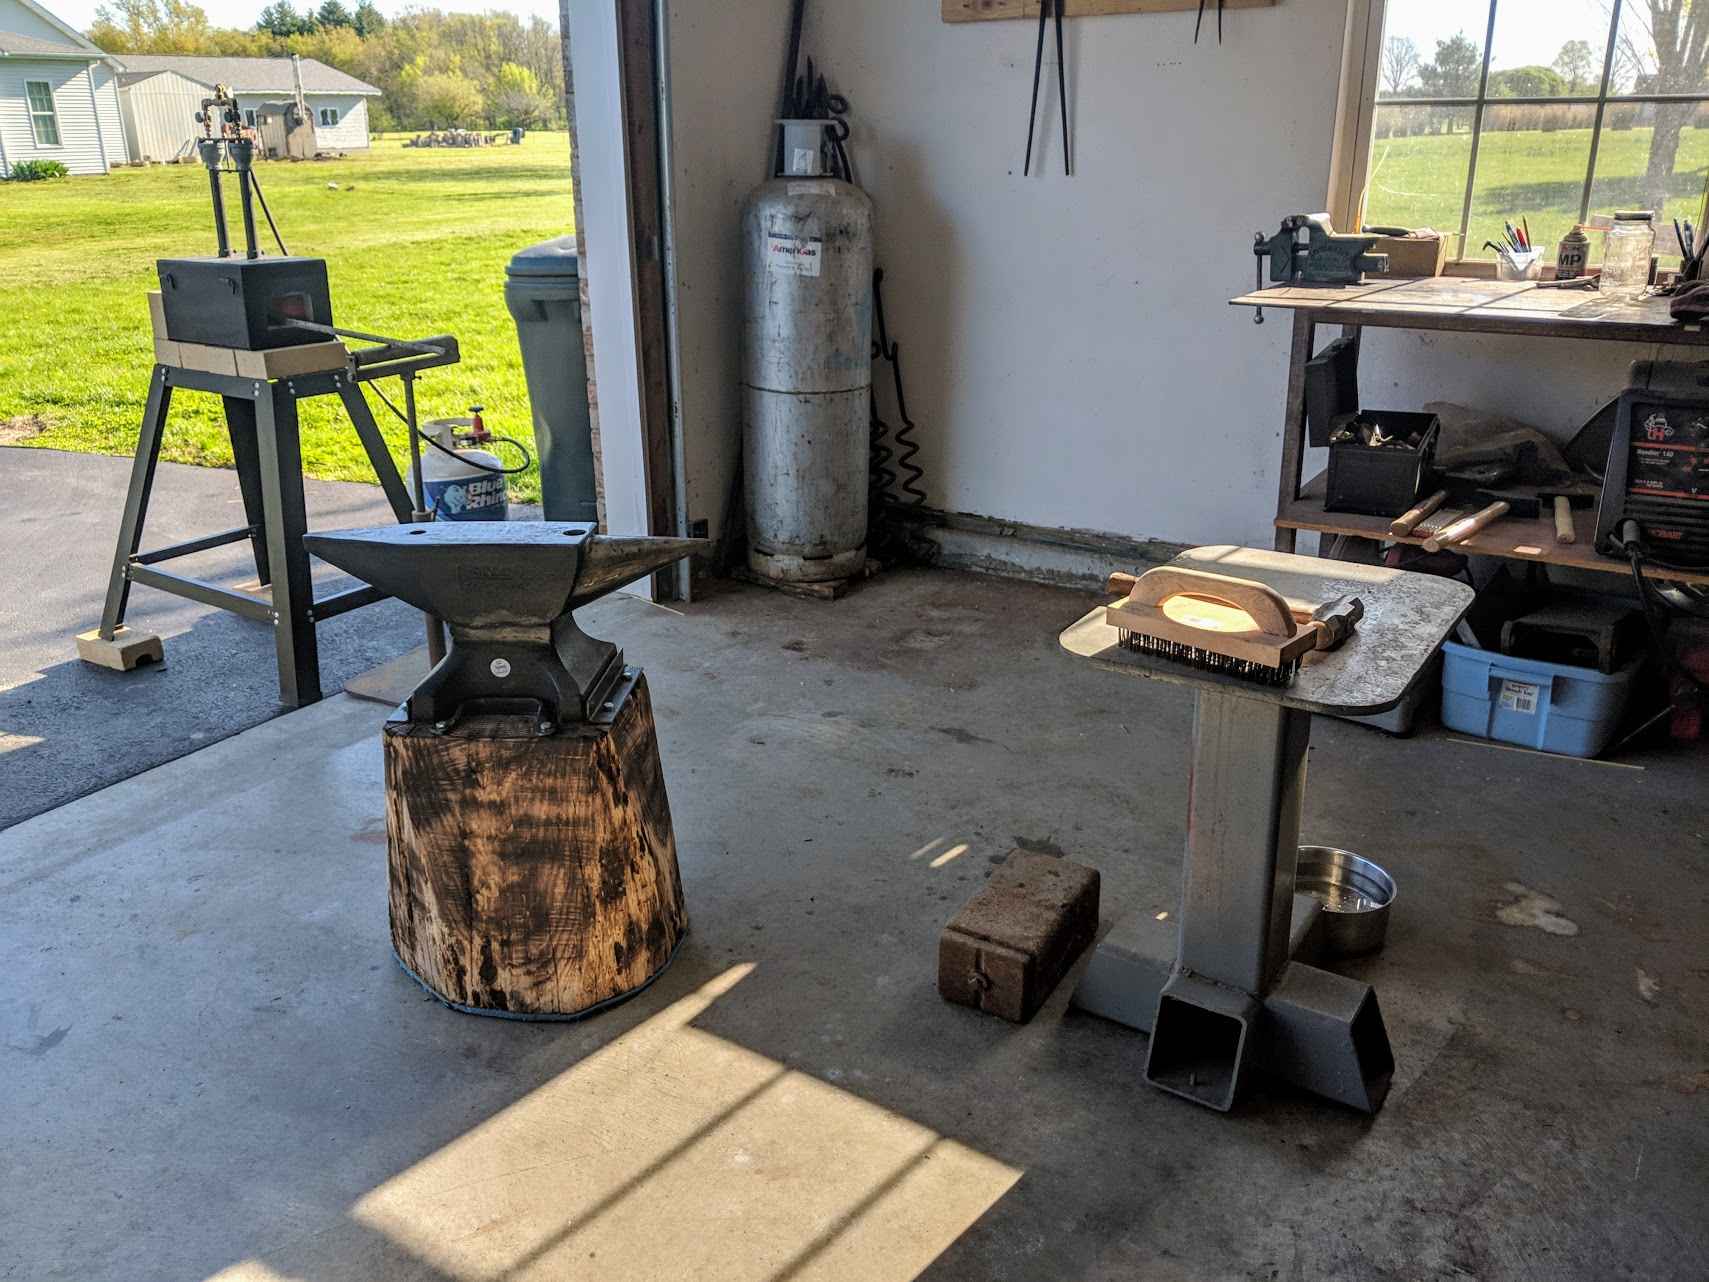
For a week now, I’ve managed to get out and work in the shop everyday. Though, It can be difficult to get anything done whilst burning up in the afternoon heat with a gas forge taking the temperature up a notch.
So this week I have switched my schedule a bit. During the morning, instead of writing, I am in the shop working. During the afternoons, when I am normally in the shop, I have been on the computer and enjoying the A/C.
The Ugly Duckling
I was given an old rusty bolt a couple of weeks ago and at the time was told it was a water main bolt.
I turns out that the industry name for it is a Mechanical Joint T-Bolt.
When I saw it, I immediately thought, “Bottle Cap Opener!”

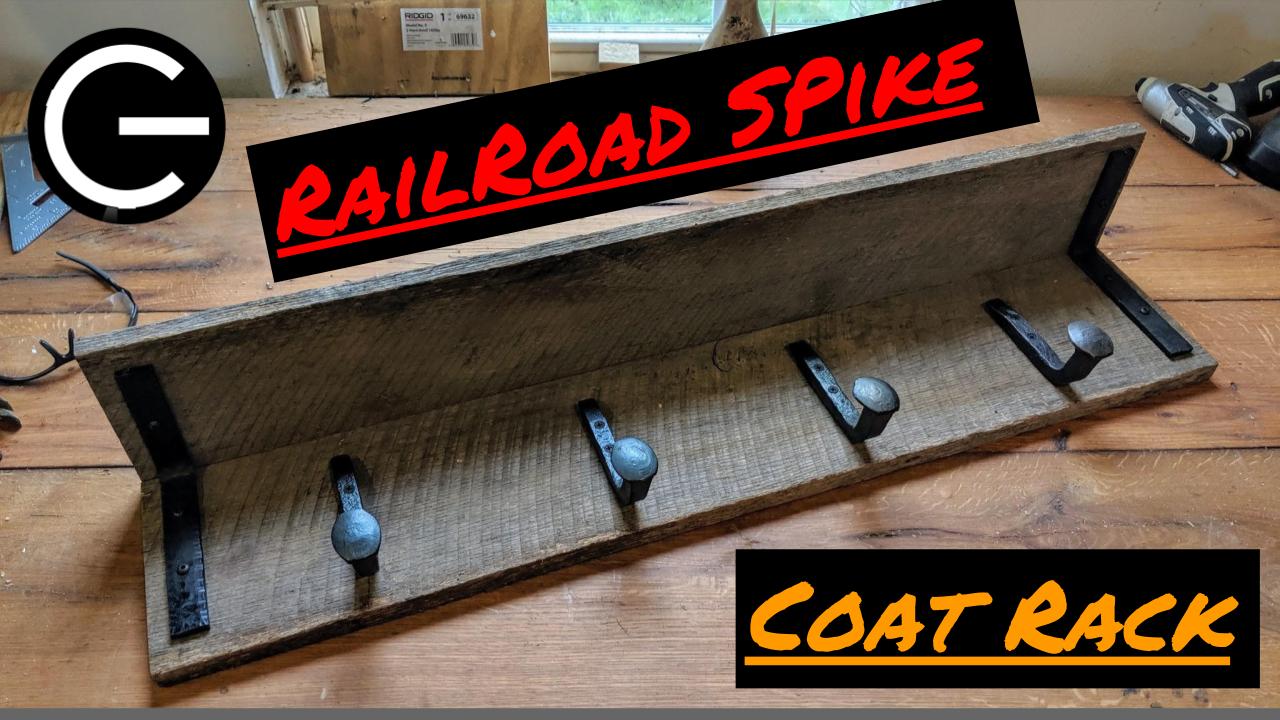
Forging my First-Ever Bottle Cap Opener
The process wasn’t too difficult. If you followed the link above, you’ll see that at the end of the bolt there is a T, a mass of metal running horizontal to the bolt and threads.
The main part of the forging was drawing out the length of the T while not widening it, as the width of the T already matched the final width of the opener.
Drawing out Metal on the Horn of the Anvil
I spent the bulk of my time on the horn drawing out the T.
As I worked, I took the piece back to the face of the anvil regularly to maintain the overall width I wanted.
Because the horn of the anvil is so rounded, when you hammer a piece of metal over it, it spreads the metal outward (in opposite directions) perpendicular with the centerline axis of the horn.
Drawing on the Edge of the Anvil
An alternative to drawing out metal on the horn is to draw it out on the edge of the anvil. Many smiths work this way (some use a rounding hammer).
For this to be most effective the edge used should be radiused. If you watch a Blacksmith do this, you’ll notice a rounded edge on the section of the anvil being used.
As my anvil is new, the horn is my go to place. I have rounded the edges of my anvil, but not to the degree that drawing out metal is effective. When I’ve tried it, It leaves gouges in the steel. My anvil’s edges are still too sharp.
Cutting, Drifting, and Shaping
After I drew out and thinned the metal, there was 2-inches of metal protruding from the bolt.
It always amazes me how much metal is in a mass of steel.
I cut off about 1-inch of the metal and then used a punch and drift to create a hole in the center of the remaining 1” x 1” piece of steel.
After drifting the hole, I went back to the horn (the very tip of it) and using a small hammer, forged the shape of a bottle cap opener.
The last step was to use the punch to forge a small catch on the inside of the opener.
The catch or lip is what pries the metal bottle-cap off the bottle.
And that’s It
Just like that, I forged my first-ever bottle cap opener.
And, although I did a pretty bad job, I love it.
I plan on putting the opener through its paces in the years to come.
Since it has quite the industrial look (and because my partner won’t allow it in her kitchen) it will live in the shop.
The next one will be better!


